
Recently, a new Large Language Model(LLM) called DeepSeek has been released. It has shaken up the whole world with its performance and cost efficiency. For tech enthusiasts and developers, the most important thing is that it’s open source. That means you can download the model on your own computer and have the same or even better performance than a paid ChatGPT.
It’s Open Source
Well, DeepSeek is neither the only open-source model out there nor is it the first open-source model. There were other already existing open-source LLMs like Llama, Qwen, Gemma, Phi, etc for other renowned companies. Still, DeepSeek has grabbed the most attention as it is as good as the latest models by ChatGPT, but with an unbelievably lower price. As it’s open-source you can now run your own ChatGPT at home. Setting up your own LLM model like DeepSeek makes sense to protect your data from third-party companies like OpenAI, Google, Microsoft, etc. Furthermore, if you have your LLM running on your local machine, you won’t even need the internet to ask questions as it’s hosted on your local computer.
What do you need in terms of Hardware?
Previously we were expected to have very powerful GPUs to train and run these LLMs, thus we saw the rise of NVIDIA. But DeepSeek doesn’t need the latest model of GPUs. Even old GPUs are well off to run a good enough DeepSeek Model. This is another fantastic thing about DeepSeek. I have even tried running a DeepSeek model on my Linux machine without any GPU! Spoiler alert, it runs but very slow. So, if you have a machine with 16GB of RAM, you are good to at least try it out. I mean you cannot install the DeepSeek r1 with 671 billion parameters but you can install a 7b or 8b model. If you also have GPUs(even older models) that’s fantastic.
What is this article for?
In this article, I am going to show you how you can also run LLMs on your own computer. This guide is not limited only to installing DeepSeek but also to any other open-source LLMs. Via this approach, running any open source LLMs. As I mentioned above, I don’t have GPUs, so I installed DeepSeek ri(1.5) billion in a very old Lenevo computer that I bought from my office. The specification of my computer is: 12 GB RAM, Intel Core i5 processor, Ubuntu 24.04 OS. You can do the same. The are a few parts you need to connect them together. The internet has enough information on how to connect them. I am just putting them all together.
Make sure you have docker installed
As I don’t like to make my computer a mess, I would like to install them via docker. Using docker we can simply download the required images and spin up the container. Once we are done we can stop(or even delete) the containers. Thus my computer stays clean instead of unknown files in what not places. Anyway, make sure you have docker installed on your computer. If you are trying to install LLMs on your personal computer then, the simplest way to install docker is by installing docker desktop. It will install almost everything you need for docker. If you don’t have GUI access but are using a remote Linux server via SSH to install the LLMs, then you can follow this official installation guide.
Don’t run every command I mentioned while reading this article until you read till the end
Step 1: Installing Ollama
If you train an AI, the output of that training is an AI model. Though training an AI takes a huge amount of data and processing power, the resultant model doesn’t. Let’s say I trained an AI with petabytes of data, after training that model I have a model file with a size of maybe a few GBs. If I share that model file with you, you don’t have to train another AI with those petabytes of data but you can simply use the trained model I shared with you that is already trained with this data. OpenAI did a similar thing, they trained AI with their data but they kept that model closed instead of sharing it with us. On the other hand, DeepSeek has made it open-sourced, so we don’t have to train a model, but we can simply use that model. Now the question is how to use a model. If you go to the documentation to know how to use their model, you will mostly see some instructions that involve Python programming language. But maybe you are not a programmer, or especially not a Python programmer.
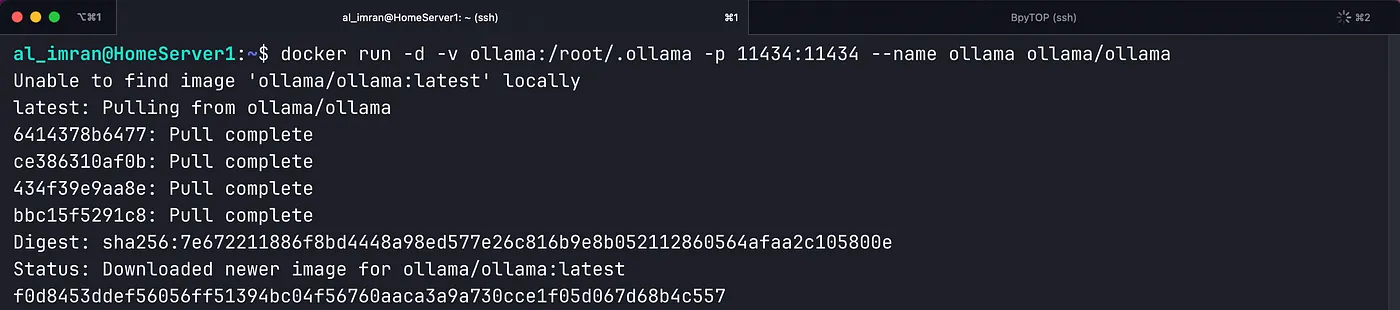
Here comes Ollama, you can think of it as a loader and runner of your LLMs like DeepSeek r1 without knowing Python programming. It also has a library of AI models that is supported by Ollama out of the box. Ollama has its official docker image, so to install Ollama via docker we have to run the following command in CLI:
docker run -d -v ollama:/root/.ollama -p 11434:11434 --name ollama ollama/ollama
Here we are running a container named Ollama in the background using the official Ollama image and exposing port 11434. This is for CPU-only setup, If you have GPU please follow the instructions mentioned in the docker image page. Once the command is executed, you can visit http://localhost:11434 in your browser, or if you are using a remote server then http://<
This should show you a page with a text written “Ollama is running”. Which means we have ollama running that can load our LLMs.

Step 2: Install Open WebUI
We have an application that can load and run the AI model. But once we run that model, how would we use it? We use ChatGPT using our browser or an App. That app is basically an interface to talk with the ChatGPT’s GPT 4o or GPT o1 models. In our case we are doing the same, we have a way to load our model but to talk with our model we need an interface, right?
Here comes Open WebUI and luckily this also has a straightforward way to install using Docker!
We need to run the following command to spin up a container named open-webui in the background:
docker run -d -p 3000:8080 --add-host=host.docker.internal:host-gateway -v open-webui:/app/backend/data --name open-webui --restart always ghcr.io/open-webui/open-webui:main
It will also expose a port 3000. This is for CPU-only setup, If you have GPU please follow the instructions mentioned in the docker image page. Once the command is executed, similarly you can visit http://localhost:3000 in your browser or if you are using a remote server then http://<
The first user is an admin user, so using this account you can add more user accounts if you want. By the way, we haven’t loaded any LLMs yet using Ollama.
Step 3: Install an LLM(eg. DeepSeek r1)
We have installed an ollama that can load and run an LLM. We have installed Open WebUI that can give us an interface to talk with the LLMs using Ollama. But we haven’t loaded any models into Ollama yet! Let’s do that now. That’s also not that complicated. As we have our Ollama container running, we can run a command inside the docker container to run any open-source LLM models we want. We can see the list of LLMs in the ollam’s library. Let’s say we want to install the smallest DeepSeek r1 model that has only 1.5 billion parameters. We can do that by using the following command:
docker exec -it ollama ollama run deepseek-r1:1.5b
In this command, we are running deepseek-r1 with 1.5b inside our ollama. This will download the deepseek-r1 model for the first time. Ideally, it should take 1.1 GB of data from your disk. You can run any other LLM model too, if you want. For instance, if you want to run deepseek r1 with 8b, you should run the following command:
docker exec -it ollama ollama run deepseek-r1:8b
This should take 4.9 GB of disk space and more processing power is required for sure. Once this command is executed, you should see a command line interface to talk with deepseek r1! Feel free to chat with that using the terminal. If you only have a CPU like me, you should start hearing the noise of the fan already.

This is because LLMs require a lot of computational power. This is exactly why having a GPU is better because a GPU can do computational processing in parallel thus much faster.
Step 4: Checking out out
Another step! Didn’t I say 3 steps in the title? Well, there is nothing left to do. Now you can again simply go to the Open WebUI in the browser and see you have deepseek-r1 as a model. Select that model and start chatting! That’s it! Feel free to try out different models based on your requirements and the hardware resources you have. As far as I have seen, with my CPU-only setup running 1.5b is slow and not that useful either. So, if you have a similar setup and notice low performance, it’s expected. If you can run the deepseek with 32b, 70b, or crazy 671b then you can expect a huge boost in response quality.
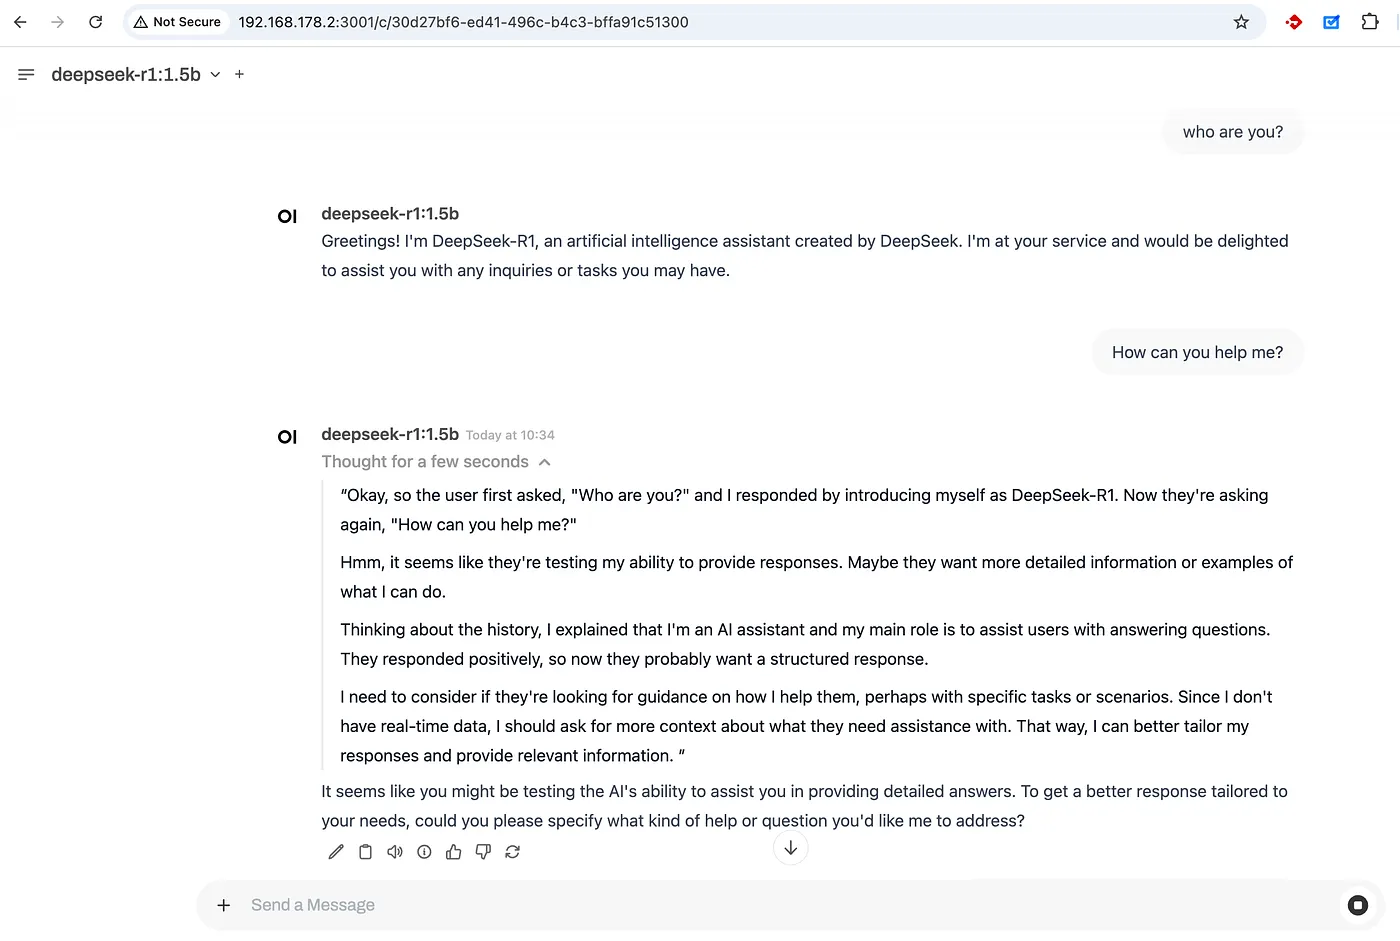
Hurrah! Now you have your own GPT running on your own computer!
Uninstalling(if you want)
To uninstall the deepseek model from ollam, you can run:
docker exec -it ollama ollama rm deepseek-r1:1.5b
To stop the Ollama and Open-WebUI containers we have spinned up using docker:
docker stop ollama
docker stop open-webui
To remove the images of Ollama and Open-WebUI we downloaded using docker:
docker image rm ollama/ollama:latest
docker image rm ghcr.io/open-webui/open-webui:main
That’s it for today.
If you want to appreciate this article, you can buy me a coffee.