
Nearly two years ago, I wrote an article titled “How I Turned an Old Laptop into a Web Hosting Server for My Laravel Application”. In that I showed how to install a laravel application in an Ubuntu server(a laptop) in a particular port(81) and then how to expose it publicly via your domain using Cloudflared.
The manual way of exposing an app via sbudomain
Now, let’s say following my that article you successfully exposed your web application to your domain(eg. example.com). Which means you have installed Cloudflared CLI in your server and you even have connected your domain using the cloudflared tunnel login command. Then you created a tunnel for example.com. What about a subdomain, I mean what if you want to expose another application on app2.example.com? The process is actually very easy. First you have to install that application in the server and expose to another port(eg. 82). Then create another tunnel that has it’s own config file that will point to that port in the service node and hostname to app2.example.com. Then create another cloudflared service to keep the tunnel running. Start that service, that’s it. Now you should have your subdomain app.example.com?
How I automated it
I basically have made an web-app using Laravel called Liftpad that has an UI where I can register the connection to servers. You can add multiple servers in case you have more than one server where you host websites.

Once you have added the server, you can select a server from websites menu. Then you will see installed cloudflared version and the list of already crated tunnels.

You can view the tunnel configurations an even delete the tunnel from the UI.
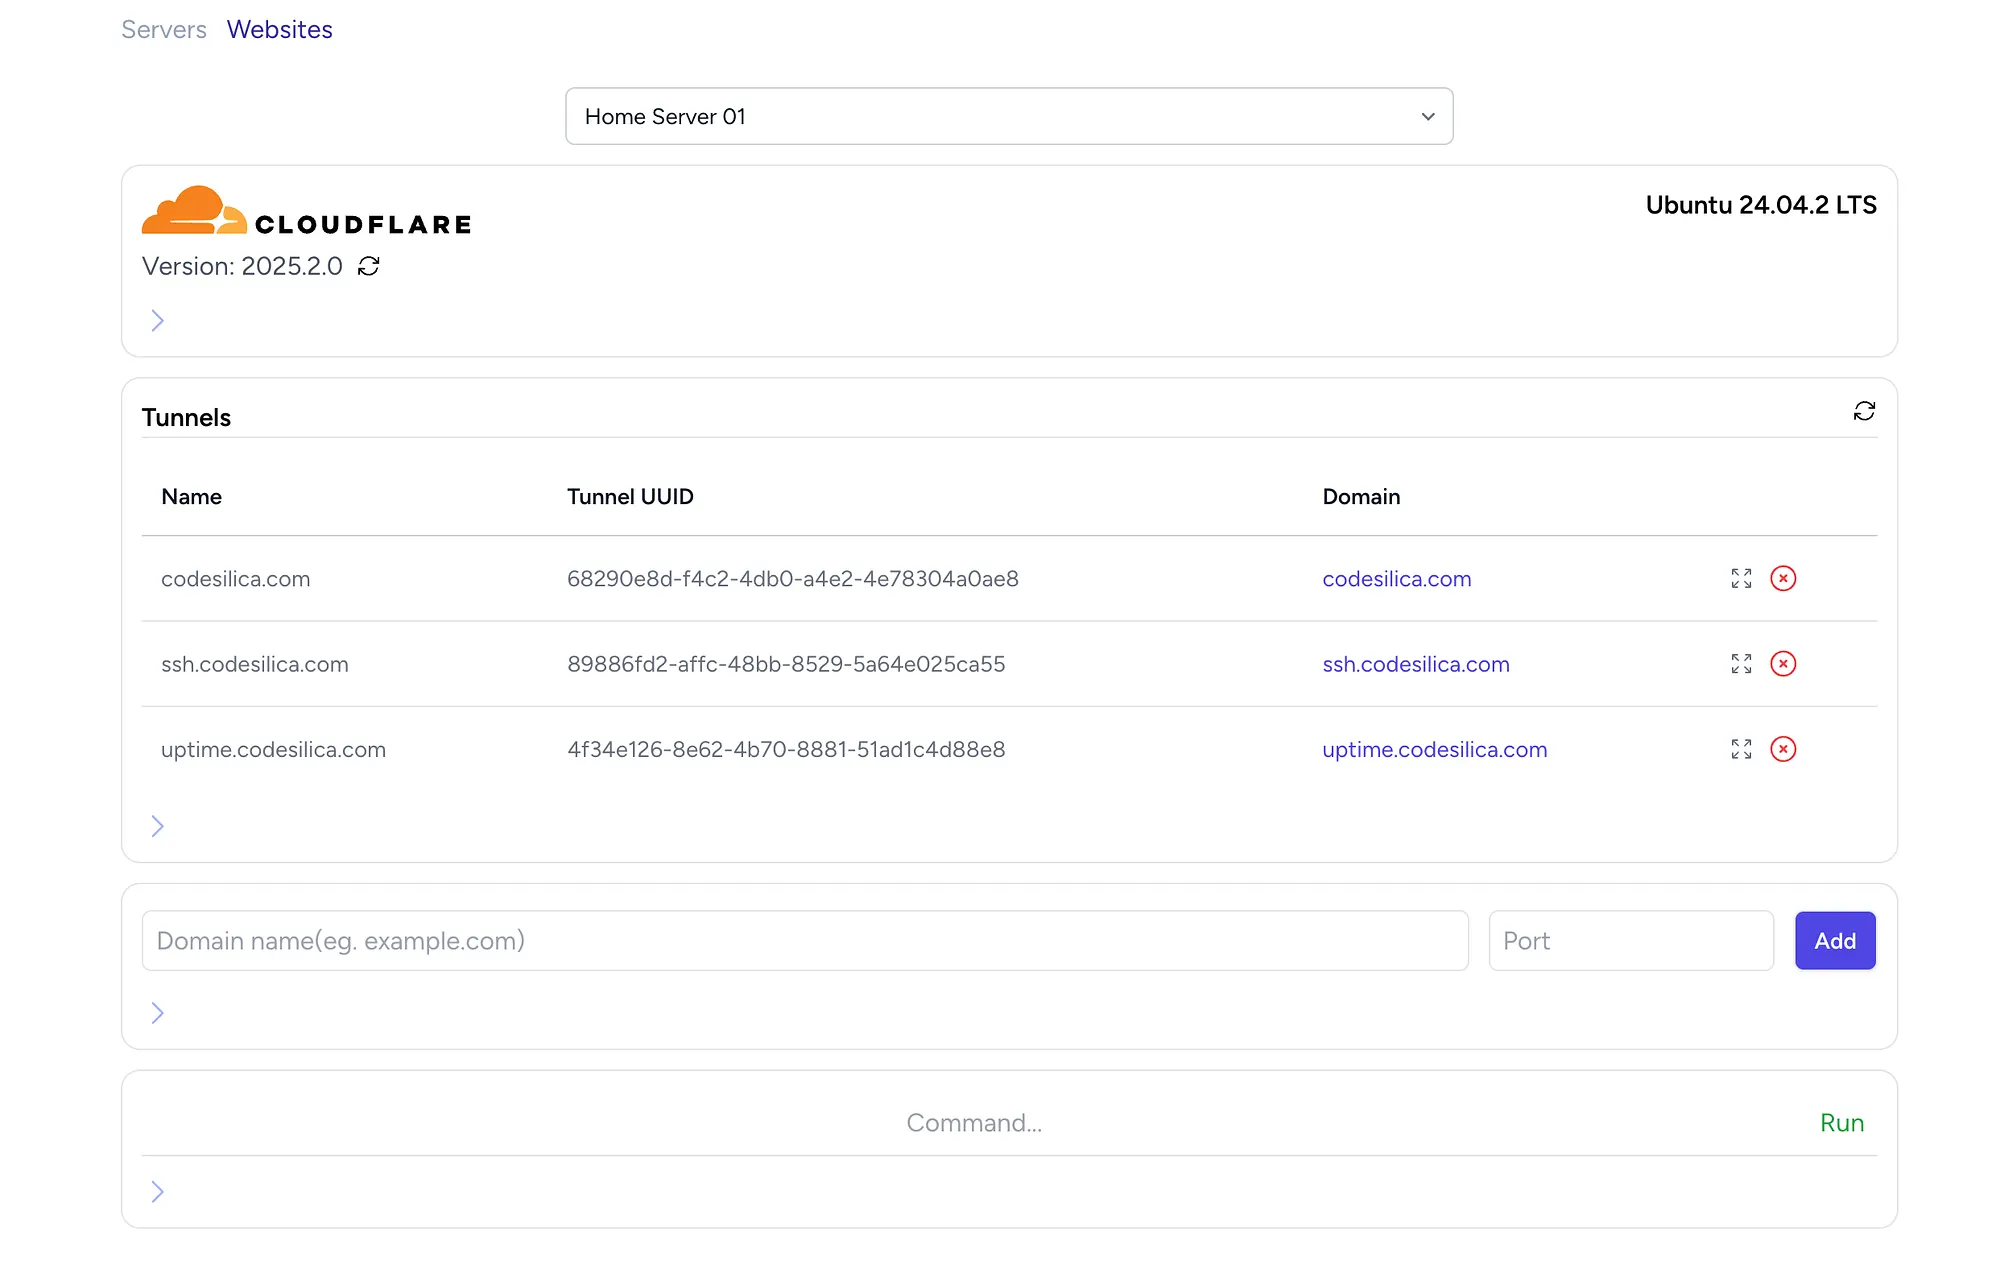
In this same page we have a form that has domain name and port and then an add button. Here you can simply add your subdomain(eg. app2.example.com) and mention the port(eg. 82) then hit “Add” button! Then this application will run all the scripts to create a tunnel then add a tunnel configuration and then create a service to run the tunnel and then start that service. You will see all these happening in a terminal view…
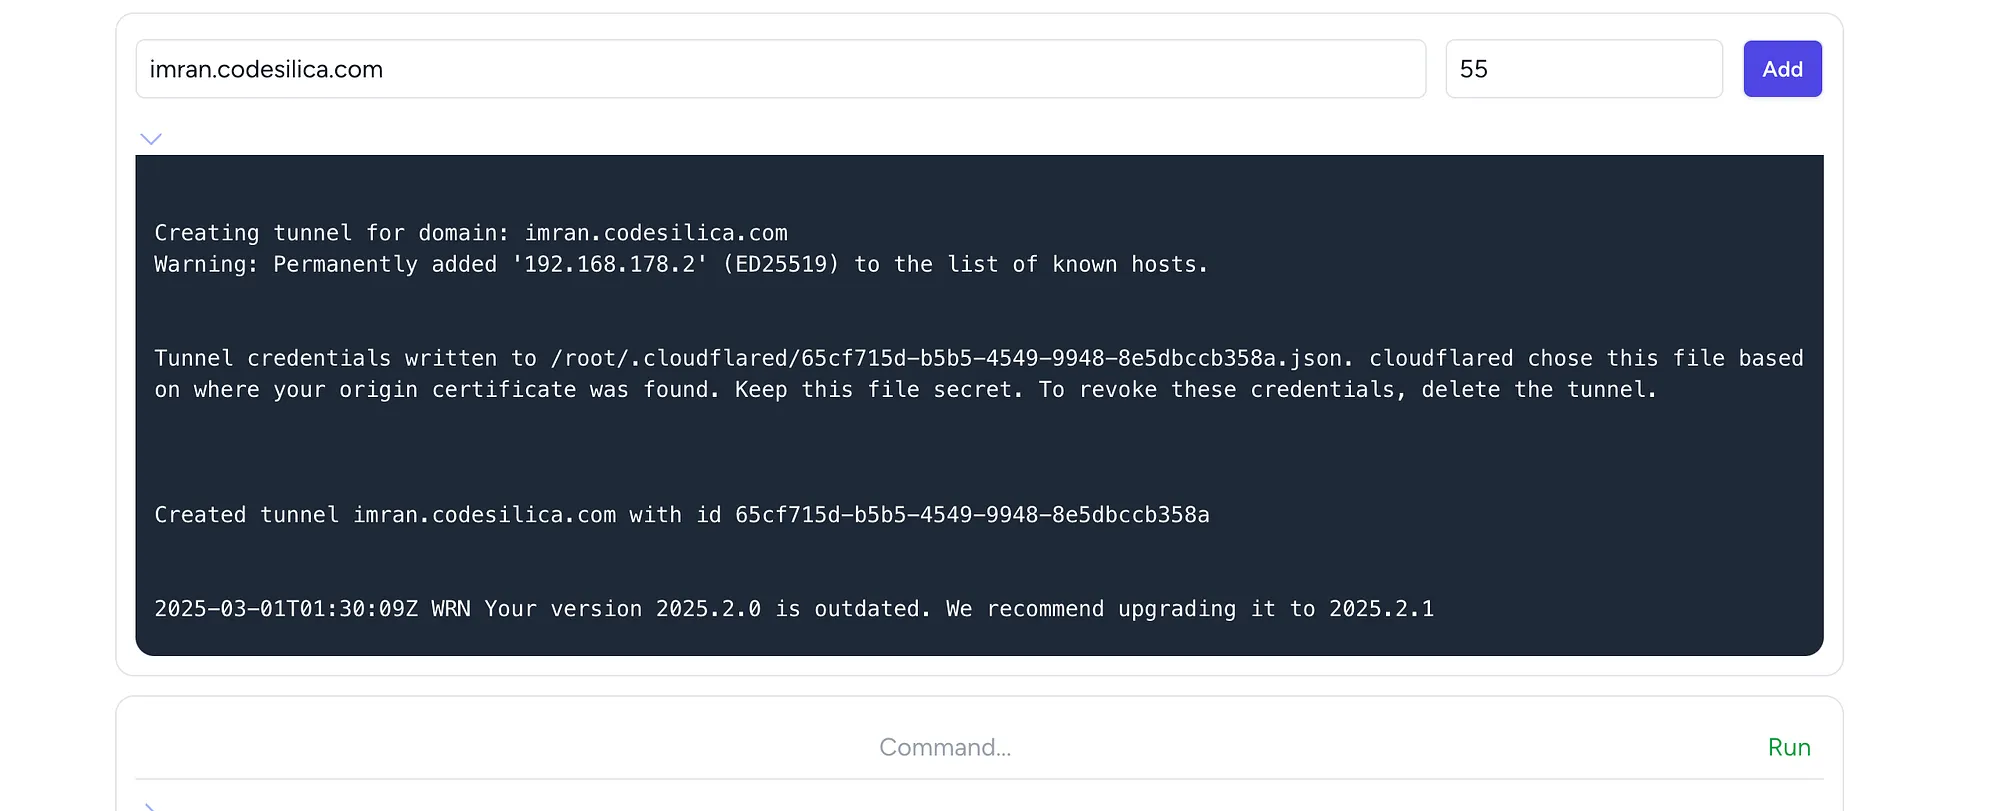
Once the process is finished, you will see the tunnel list is updated and you can access your app2.example.com! In short all you needed to do is enter what subdomain you want to register and at which port it is exposed in the server. Now if you want to delete that tunnel and subdomain you have the option to delete that too. All these action button in the app is basically execute the cloudflared and other nacessary command in the server insated of adding them running manually again and again.
FYI: this is an experimental app, it may not handle a lot of cases and may breaks. It just works for the use case I wanted it to work for.
Why I made this?
Well, as this is my own local server and I want to experiment a lot with so many web applications I build as a pet project, I frequently need to spin up the web application to a subdomain. As a software engineer I don’t like to repeat these commands. By the way, I could have wrote a CLI script, but I also wanted to experiment with the steaming functionality of Laravel Livewire. As you can see whenever the commands are being executed in the server, the output of those commands will be shown real-time. No socket used or ajax/api request made. I didn’t try this before.
Should you use it?
The Liftpad app that I made to have these functionalities mentioned above is open source. You can see the commands that is being executed when you push a button. By the way, it only works on debian based linux distribution at this moment. So, if you have a server to play with and debian based linux(eg. Ubuntu) is installed in it, and want to expose multiple web application using Cloudflare tunnelling, this can be helpful. Still, I made this only for my own use, if you feel this can usefull for you, try it out.
If you find this article or the app I made useful and you want to appreaciate my contribution feel free to let me know via clap or comments. By the way, you can also buy me coffee using this link!